Build your first itinerary
We will walk through all steps it takes to build an engaging, vivid itinerary.
The goal of this blog post is to show you how to get started building your first own itinerary with Itinershary. I will try to get into the details that make the itinerary specifically engaging and useful. In this itinerary we will be using the features:
- Multiple Events
- Custom camera flight from event to event
- Points of Interest (POI)
- Custom HTML event and POI description
- Map interactivity
- Live user location
- Horizontal and vertical event scrolling
- Hidden waypoints, for route modification
Scenario for this blog
For the purpose of this blog, we will assume that we are a event organizer and want to present a marathon race on the event website.
We have chosen Itinershary for this presentation because we want to convert a high percentage of the visitors of the website to either participate or watch the event.
Also, we would like to highlight the booths of our premium sponsors on the map, as part of the sponsorship package.
Let's get started!
Choose the theme and name
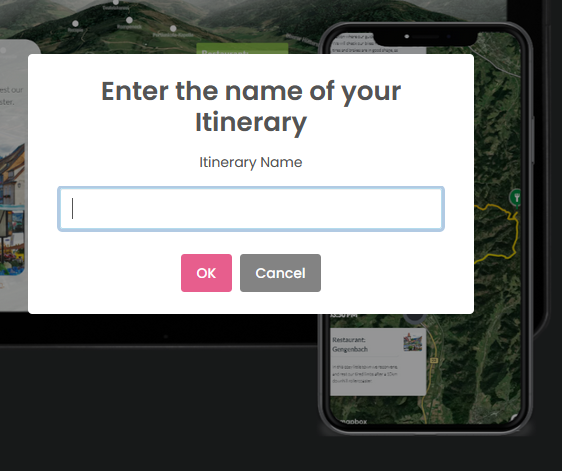
As a first step, let's start a new itinerary, select the "Outdoor" theme and give the Itinerary a name.
Create the first event
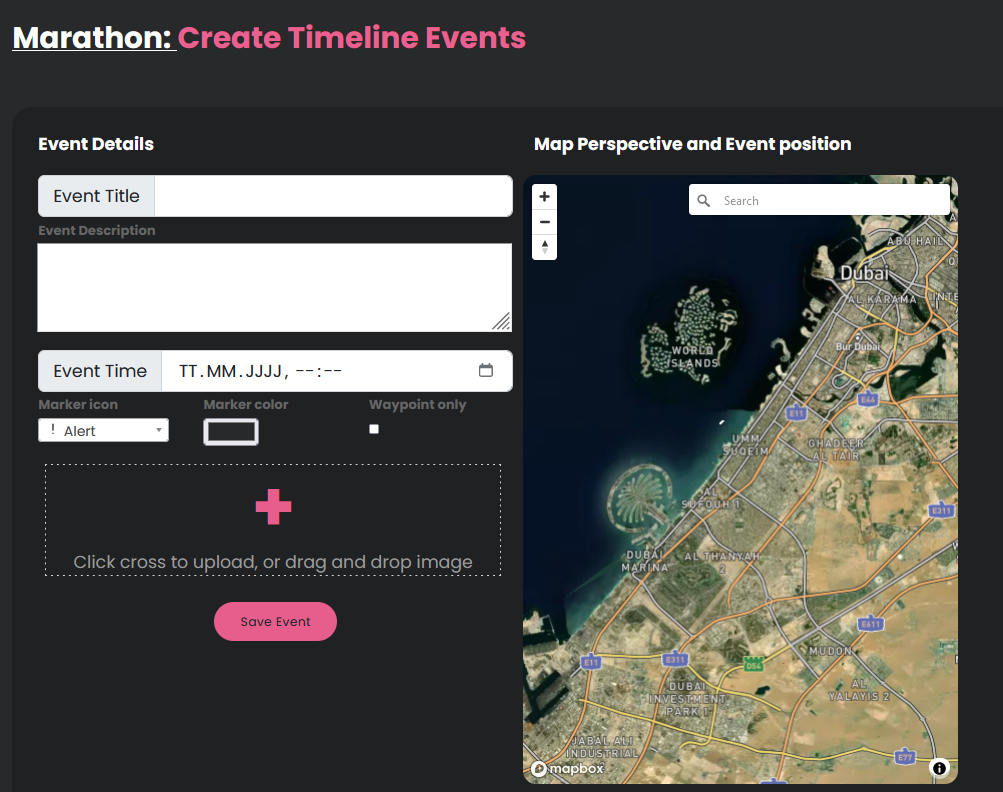
Next, let's create the first event. We will first give the event a title (maximum of 30 characters). The event description (max. 500 chars) is also required.
The time is optional. We will still set it, because the start time of the marathon event is relevant.
Additional event settings
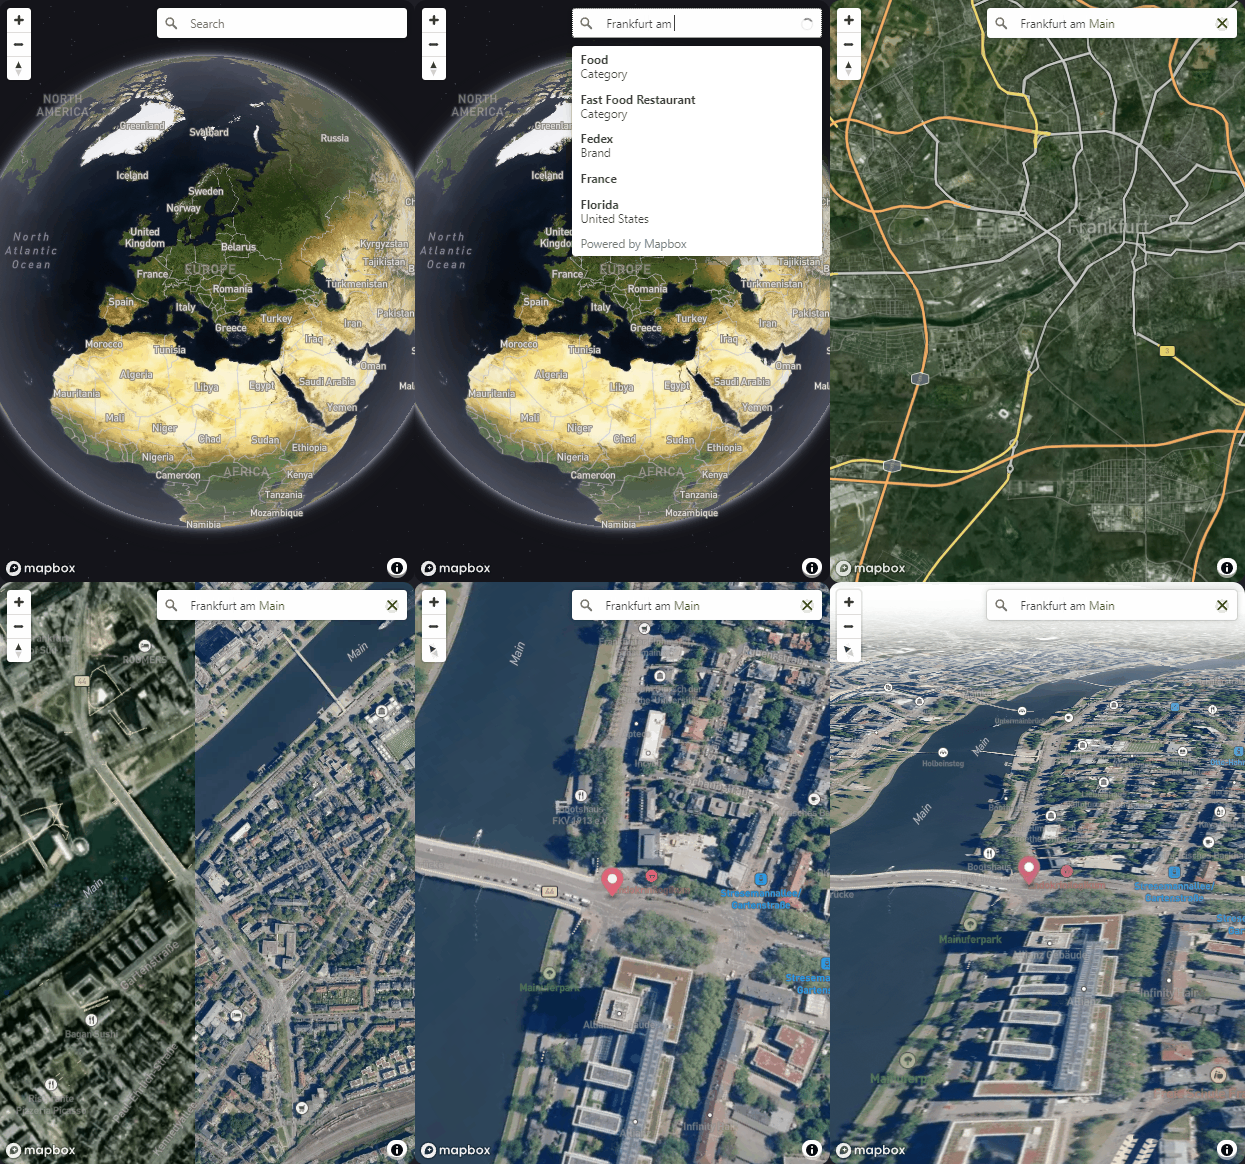
The map on the right hand side is used to search the event location and position the event, by clicking the map.
The camera flight that is used as the transition animation between the events will animate the map perspective to the exact camera perspective that is set here, when saving the event. We will tilt and zoom in a bit on our marathon start(see video).
We will upload an image (png and jpg are supported; max size 10MB). While this is not required, the itinerary does not look complete without an image.
"Waypoint only" means that the current event will only be used to change the route line. It will not appear as an itinerary event, when the box is checked. (we will not use this now)
Saving Event, Overview
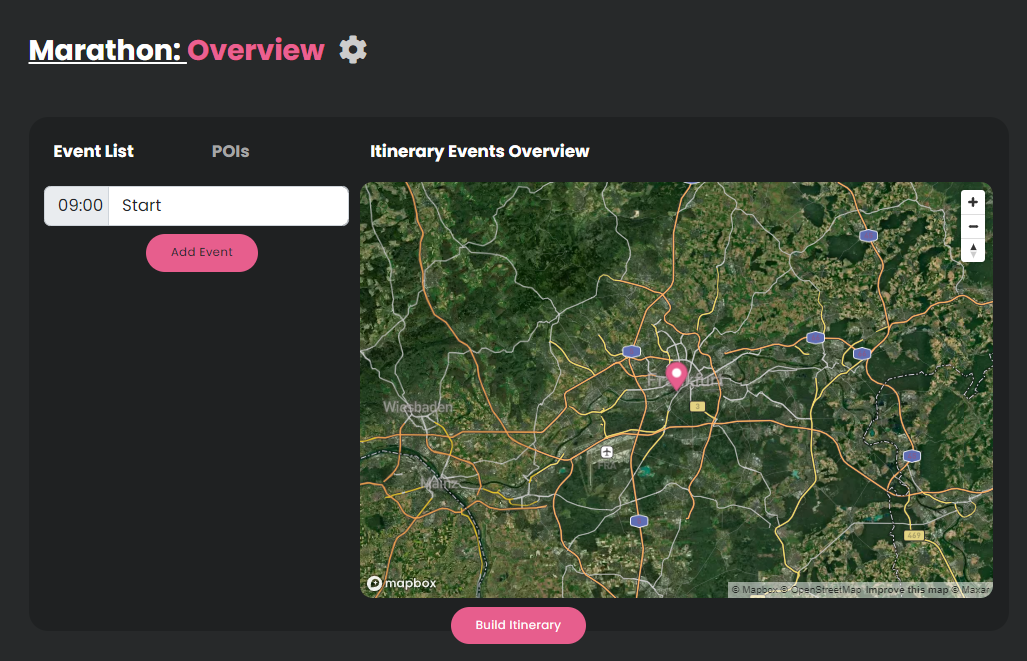
Saving the event will trigger a popup box where you can choose, to "Yes, proceed to next event", or go to "Overview". The overview at this point will only show a single event.
"Add Event" will add another event at the end of the events list. (this is how we will proceed now)
The "POI" section is separate from the events. You can add custom points of interest (POIs) independent from the events. The POIs will not impact the route, or the events. (We will get back to that later)
The cogwheel on the top right will get you to the itinerary settings, where you can change several customization options of the itinerary. (see)
"Build Itinerary" will build the configured itinerary draft and publish it. (We will do that once we have a few events)
Let's go ahead and create a few events!
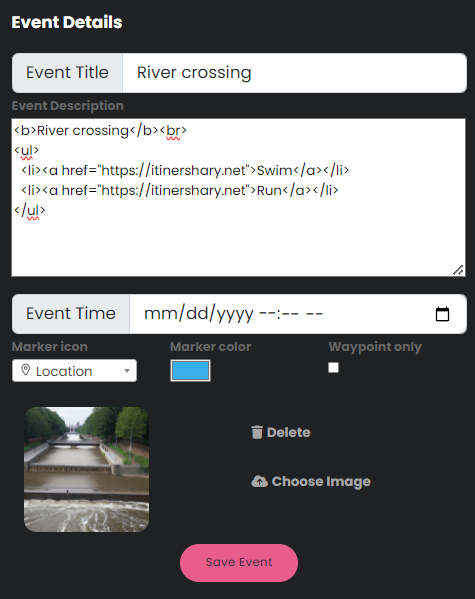
Add HTML to event description
The event description field and the POI description field support HTML.
I am adding an unordered list with 2 options to cross the river. Each option links to a URL.
Copy the code below and paste it to your event description to add a list with 2 links.
<b>River crossing</b><br>
<ul>
<li><a href="https://itinershary.net">Swim</a></li>
<li><a href="https://itinershary.net">Run</a></li>
</ul>
Adding POIs
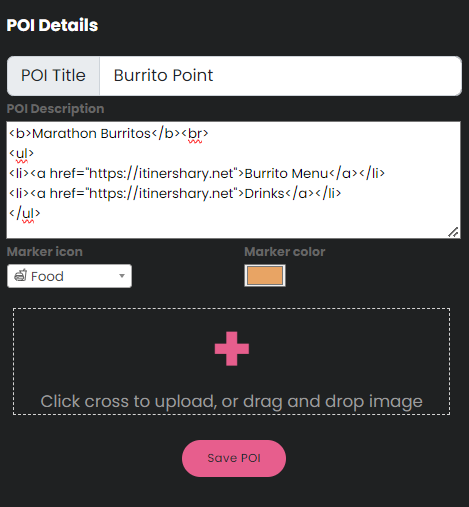
Similar to events, points of interest (POIs) can be created. The difference is that the POIs will not have an impact on the route line. Also POIs do not have a details card with image, such as the events. You can only view the information attached to a POI by selecting it on the map. Start adding POIs by selecting the "POIs" header in the itinerary overview and then selecting "Add POI".
Similar to the event description, the POI description accepts HTML code. Copy the code below and paste it to your POI description to add a description with a list of 2 links.
<b>Marathon Burritos</b><br>
<ul>
<li><a href="https://itinershary.net">Burrito Menu</a></li>
<li><a href="https://itinershary.net">Drinks</a></li>
</ul>
Customize itinerary
After having created multiple events and POIs, it is time to further customize
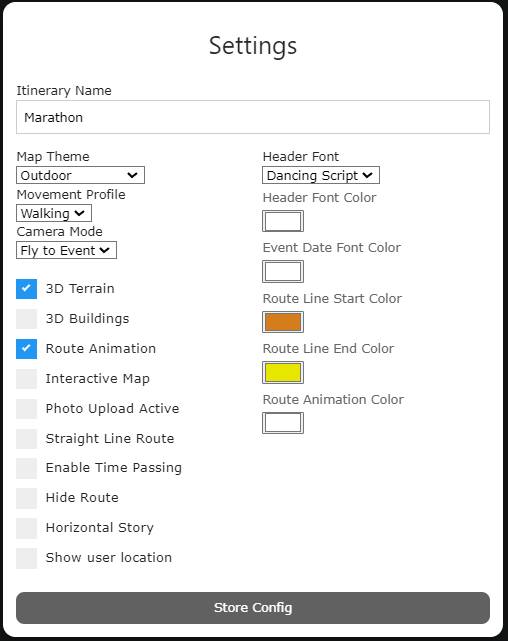
the itinerary to your requirements. Through the cogwheel on the itinerary overview page, we get to the configuration page (see left).
The colors of the headers, dates, route line and route animation can be changed here. Also the header font can be customized. Besides these:
"Interactive Map" makes the map react on user interaction, like zooming, panning, rotating or tilting.
"Map Theme" changes the map theme to a different style, such as urban or slim.
"Movement Profile" changes the mode of transport that is used when planning the route.
"Camera Mode" allows to choose between 3 different transitions between events.
"3D Terrain" makes the map show terrain, such as mountains.
"3D Buildings" will add a 3D buildings layer on to the map.
"Route Animation" animates the route in the movement direction (beta)
"Photo Upload Active" allows uploading photos to each event. (beta)
"Straight Line Route" connects the events with straight lines instead of calculating a route on the road network. This is useful for flights or ship routes. Or if no road network exists.
"Enable Time Passing" greys out events that lay in the past.
"Hide Route" hides the route line.
"Horizontal Story" changes the scrolling direction to horizontal. This is specifically useful on smartphone screens, so that less map is covered by the event cards.
"Show User Location" gives the user the option to show the current user location in context of the itinerary.
For this itinerary, I will enable "3D Buildings", "Show User Location", "Horizontal Story" and "Interactive Map".
Building and Publishing the Itinerary
Once we are done creating events and POIs and have changed the configuration to our needs, let us build the itinerary to see what it already looks like.
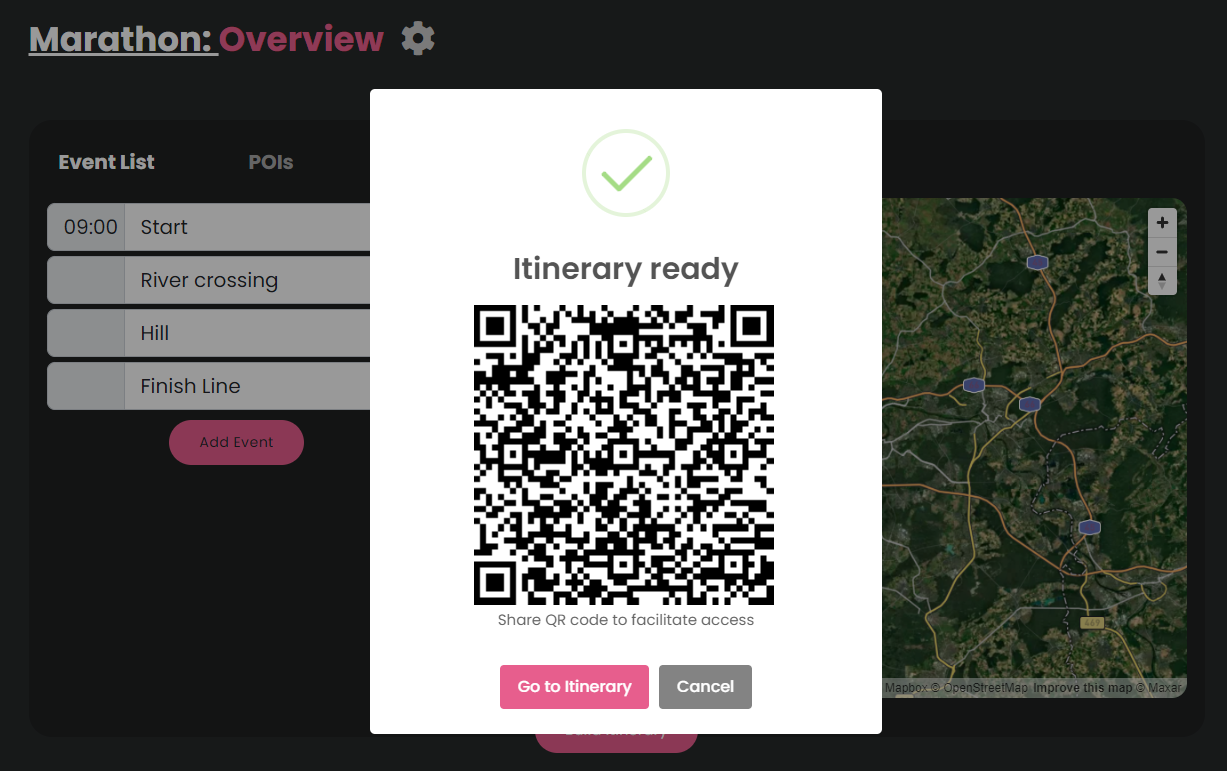
Select the "Build Itinerary" Button, read the terms and conditions and build the itinerary after accepting the terms of conditions. This will:
Generate the Itinerary, so that it is available under the Itinerary URL.
Publish the Itinerary, if it was not published, or was set offline.
Generate a QR Code that can be copied and used to share the Itinerary
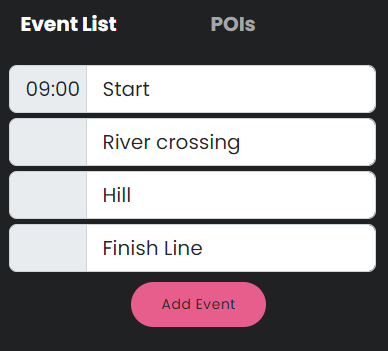
Change Event Order
The event order can be changed by dragging and dropping an event in the itinerary overview (see left).
To update the order in the published itinerary, follow the dialogue after clicking on the "Build Itinerary" button.
Managing Itineraries
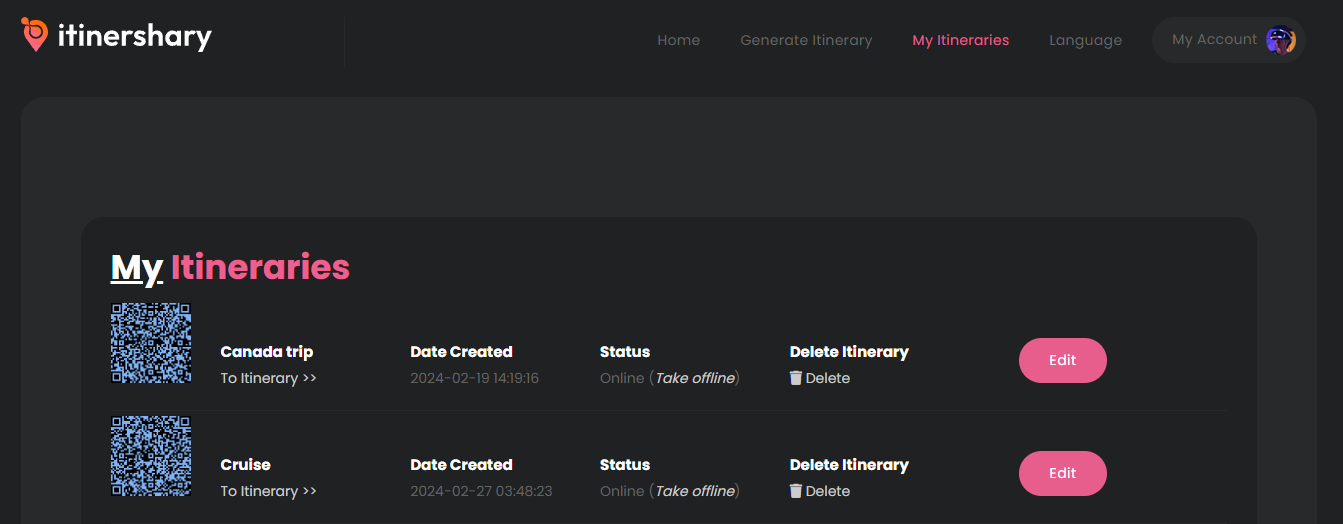
After creating an itinerary, that means giving it a name, it will appear in "Manage Itineraries".
On this page you can see the status details of your itineraries and manage them. You can:
Copy the QR code, and go "To Itinerary", to view it.
See when it was created.
Check whether the itinerary is currently online and take it offline if needed.
Delete the itinerary. Including all its events, POIs and images.
Go to the overview page of a selected itinerary by clicking the "Edit" button.
Add Itinershary to your website using an iFrame
Follow the steps in the Developer section to add the itinerary you have created to your website. This can be achieved by adding it via an iFrame.
<iframe src="https://itinershary.net/itineraries/?id=657d7ab764a930.52855830" title="Urban Theme"></iframe>

Timotheus Foerster
June 6th, 2024